
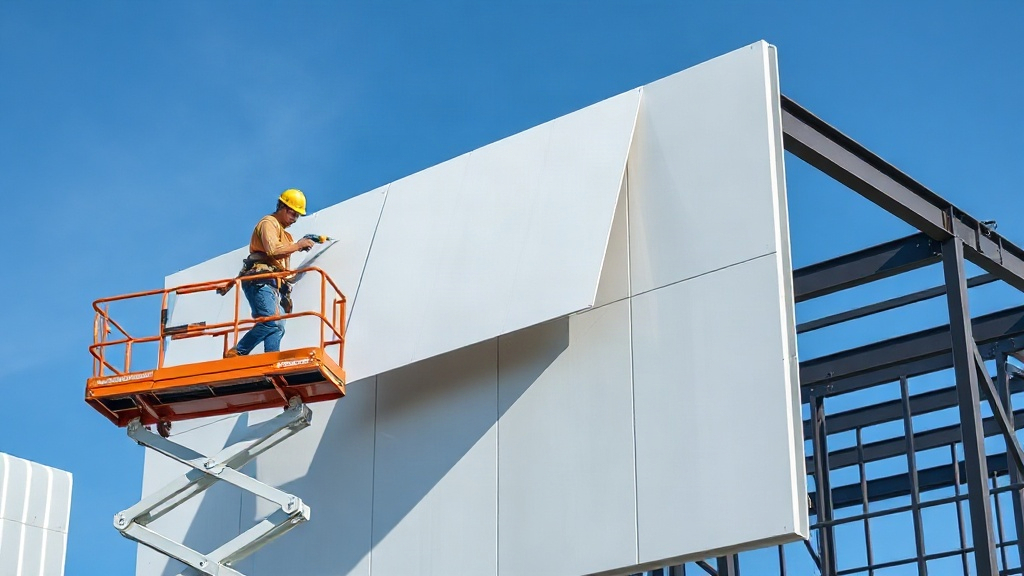
When you're on a job site in Canada, whether it's a cold storage warehouse in Alberta or a commercial building in Ontario, the success of your project often hinges on getting Panel Installation & Specs right. I've spent over a decade installing and specifying sandwich panels across diverse Canadian climates, and I've seen firsthand how small oversights in installation or specification can lead to big problems down the road. This guide distills that experience into actionable advice, so you can avoid common pitfalls and ensure your panels perform as intended.
Understanding Sandwich Panel Specs: More Than Just Thickness
Sandwich panels are composite building elements made of two rigid facings bonded to a insulating core. While thickness is a key spec, it's far from the only one. The facing material, core type, and joint details all influence performance. For Canadian projects, you'll typically encounter facings like pre-painted steel, aluminum, or fiberglass, and cores such as polyisocyanurate (PIR), expanded polystyrene (EPS), or mineral wool. Each combination offers different thermal, fire, and structural characteristics.
When reviewing specs, pay close attention to the R-value per inch. PIR panels, for instance, often achieve R-6 to R-7 per inch, while EPS is around R-4. Mineral wool provides excellent fire resistance but lower R-value per inch. Also, check the panel's load-span tables, which dictate the maximum spacing between supports based on wind load and snow load. In Canada, snow loads can be substantial, so never skip this step. I recall a project in Quebec where underspecified panels sagged under heavy snow, leading to costly repairs. Always verify that the panels meet local building codes, including the National Building Code of Canada and provincial amendments.
Pre-Installation Best Practices
Before a single panel goes up, proper planning and site preparation are critical. Start by reviewing the architectural and structural drawings to confirm panel layout, support locations, and penetration details. Measure twice, cut once is cliché but true. I always recommend a pre-installation meeting with the crew to walk through the sequence and address any questions.
Substrate and Support Preparation
The substrate or support structure must be level, square, and structurally sound. For wall panels, this could be a steel frame, concrete, or masonry. Ensure that all supports are aligned within tolerances; typically, a maximum deviation of 1/8 inch over 10 feet is acceptable, but check the manufacturer's requirements. Clean the surface of any debris, oil, or loose material that could hinder adhesion or fastening. If you're installing over existing walls, verify that the substrate can handle the additional load.
Material Handling and Storage
Sandwich panels are durable but can be damaged if mishandled. Store panels on a flat, elevated surface with adequate support to prevent bowing. Keep them covered to protect from moisture and UV exposure until installation. When lifting, use spreader bars and nylon slings to avoid point loads. I've seen panels dented by careless forklift operators, so train your team on proper handling techniques.
Step-by-Step Installation Guide
While every project has unique aspects, the general installation sequence for sandwich panels follows a similar pattern. Here's a breakdown of the key steps, with tips I've learned from years on site.
- Set the first panel: Start at a corner or a designated reference line. Ensure it's plumb and level before fastening. Use temporary braces to hold it in place.
- Apply sealant: Run a continuous bead of approved sealant along the joint where the next panel will meet. This is crucial for weathertightness.
- Position and engage the next panel: Slide the panel into the joint, ensuring the tongue and groove or lap detail engages fully. Check alignment.
- Fasten the panels: Use the specified fasteners (usually self-drilling screws with washers) at the recommended spacing. Drive screws perpendicular to the panel surface and avoid over-tightening, which can crush the core.
- Repeat the process: Continue across the wall or roof, checking plumb and level periodically.
- Install trim and flashings: After all panels are up, install base trim, corner trim, and flashings to seal edges and openings.
For roof panels, consider using a panel lifter to hoist them into place safely. Also, pay attention to thermal expansion and contraction; leave appropriate gaps at fixed points and use slotted holes where necessary.
Fastening and Sealing: The Details That Matter
The longevity of your installation depends heavily on fastening and sealing. Use only fasteners approved by the panel manufacturer; they should have a sealing washer and be made of corrosion-resistant material. For steel facings, self-drilling screws with EPDM washers are common. Drive them at the specified torque, typically around 15-20 inch-pounds, but always check the manufacturer's recommendations.
Sealant selection is equally important. Use a high-quality silicone or polyurethane sealant compatible with the panel facings. Apply sealant in all joints, including vertical and horizontal seams, and around penetrations. I've seen leaks develop because someone skipped sealant on a few joints; water always finds a way. Also, ensure that you're installing panels with the correct orientation: the male and female edges should align to shed water outward.
Common Mistakes to Avoid
Even experienced installers can slip up. Here are some frequent errors I've encountered and how to avoid them:
- Ignoring expansion: Panels expand and contract with temperature changes. Not allowing for movement can cause buckling or joint failure.
- Over-tightening fasteners: This can damage the panel core and reduce thermal performance. Use a torque-limited driver.
- Poor alignment: Starting off plumb and level is crucial; otherwise, errors compound across the wall.
- Inadequate sealing: Missing sealant in joints or around penetrations is a recipe for leaks.
- Using wrong fasteners: Mismatched fasteners can corrode or fail to hold.
Avoiding these mistakes will save you time and money on callbacks.
Performance Specifications: Thermal, Fire, and Structural
When specifying sandwich panels, you need to balance thermal performance, fire safety, and structural integrity. In Canada, energy codes like the National Energy Code for Buildings (NECB) set minimum R-values for building envelopes. For example, a wall in Toronto might require R-20, while a roof in Yellowknife could need R-40. Choose panel thickness accordingly.
Fire performance is another critical spec. Mineral wool cores offer non-combustible fire resistance ratings, often up to 2 hours, while PIR and EPS have lower ratings. Check the Canada Building Code for occupancy-specific requirements. Structurally, ensure the panels can withstand wind and snow loads for your region. The manufacturer's load-span tables are your best resource.
Maintenance and Inspection After Installation
Once installed, sandwich panels require minimal maintenance, but regular inspections are wise. Check for loose fasteners, damaged sealant, or dents. Address any issues promptly to prevent water infiltration. Clean panels with mild soap and water; avoid abrasive cleaners that could damage the finish. In snowy regions, prevent snow accumulation on roofs to avoid overloading.
Frequently Asked Questions
What is the typical R-value of a 4-inch sandwich panel?
It depends on the core material. A 4-inch PIR panel might have an R-value around 24 to 28, while EPS would be around 16 to 20. Always check the manufacturer's published data.
Can sandwich panels be installed in cold weather?
Yes, but special precautions are needed. Sealants may require low-temperature formulations, and panels can become brittle. Follow the manufacturer's cold-weather installation guidelines.
How do I handle penetrations for pipes or ducts?
Use pre-formed flashing boots or field-fabricated flashings with proper sealant. Ensure the penetration is sealed to prevent water ingress and thermal bridging.
What is the maximum span for a sandwich panel roof?
It varies by panel profile, thickness, and load. Consult the load-span tables provided by the manufacturer; typical spans range from 2 to 6 feet for roofs.
Do I need to use a vapor barrier with sandwich panels?
Usually, sandwich panels with closed-cell cores act as their own vapor barrier. However, in high-humidity buildings, an additional vapor barrier may be required on the warm side. Consult a building scientist.